Alerts
Using the GRIDS Alerts feature, you can set up a request for a Property Fraud Alert (PFA). Activity noted by the Recorder’s office on a property you have submitted will trigger an alert message which will be emailed to you and also remain available in My Alerts until you delete the alert you set up. You can set up an alert on a name that has been indexed with a property and you can then narrow the results by adding a Parcel ID number or other specific information.
For example, if you searched on the name "Abraham Lincoln" and set up an alert on the search results, you would receive email alerts for all activity involving properties with this indexed name. You can narrow the search results down by adding information such as the property description. Once you click the Add Alert button, you would start receiving alerts on all activity on a property with the indexed name of "Abraham Lincoln" plus the specified property description.
NOTE: Some counties charge a day-rate search fee to access their records. After searching for your property of interest and entering your Alerts request information, you will be directed to PayPal to pay the day-rate fee for searching records. This will complete your PFA request. Once you are signed up, you can access the Alerts section and look at, edit, and view history of your existing alert, or add a new alert, without further charges.
If you later search for documents or make copies, you will need to pay the set fees for those services.
Sign Up for Property Fraud Alerts
Click the Alerts dropdown caret and select Search.
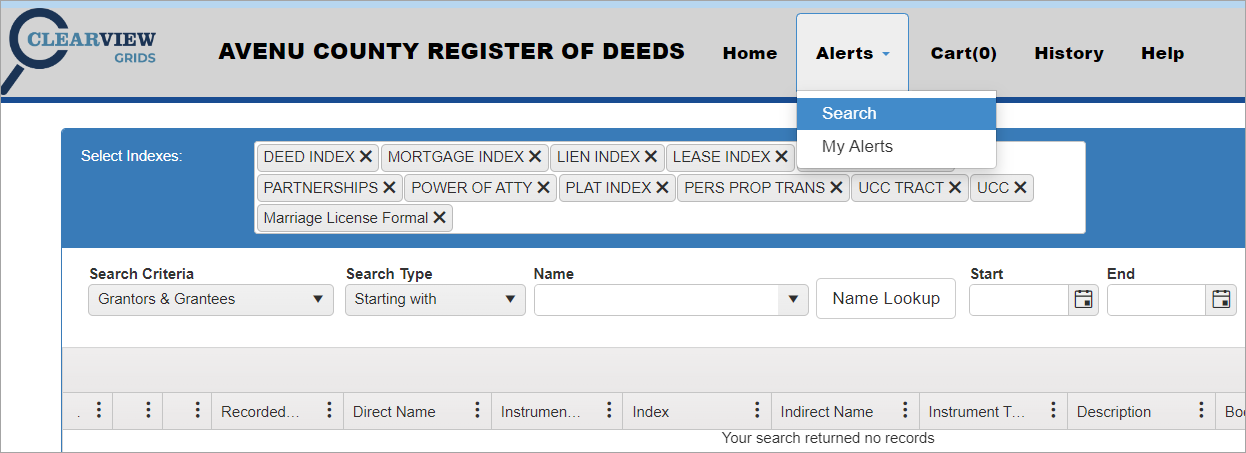
The Property Fraud Alerts (PFA) Search screen opens.
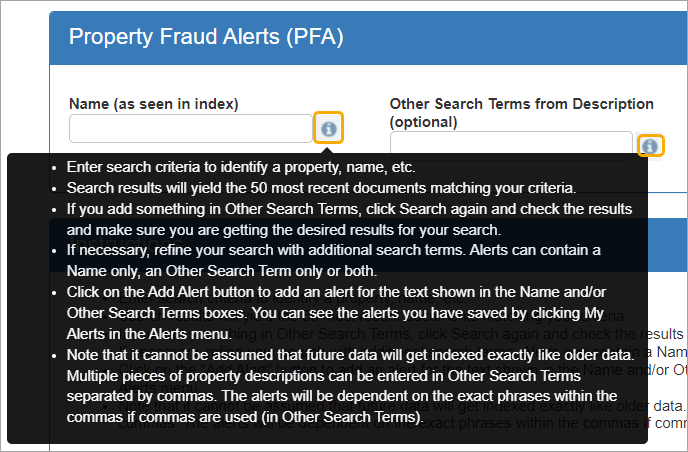
The instructions can be read on this screen and are also accessible while searching.
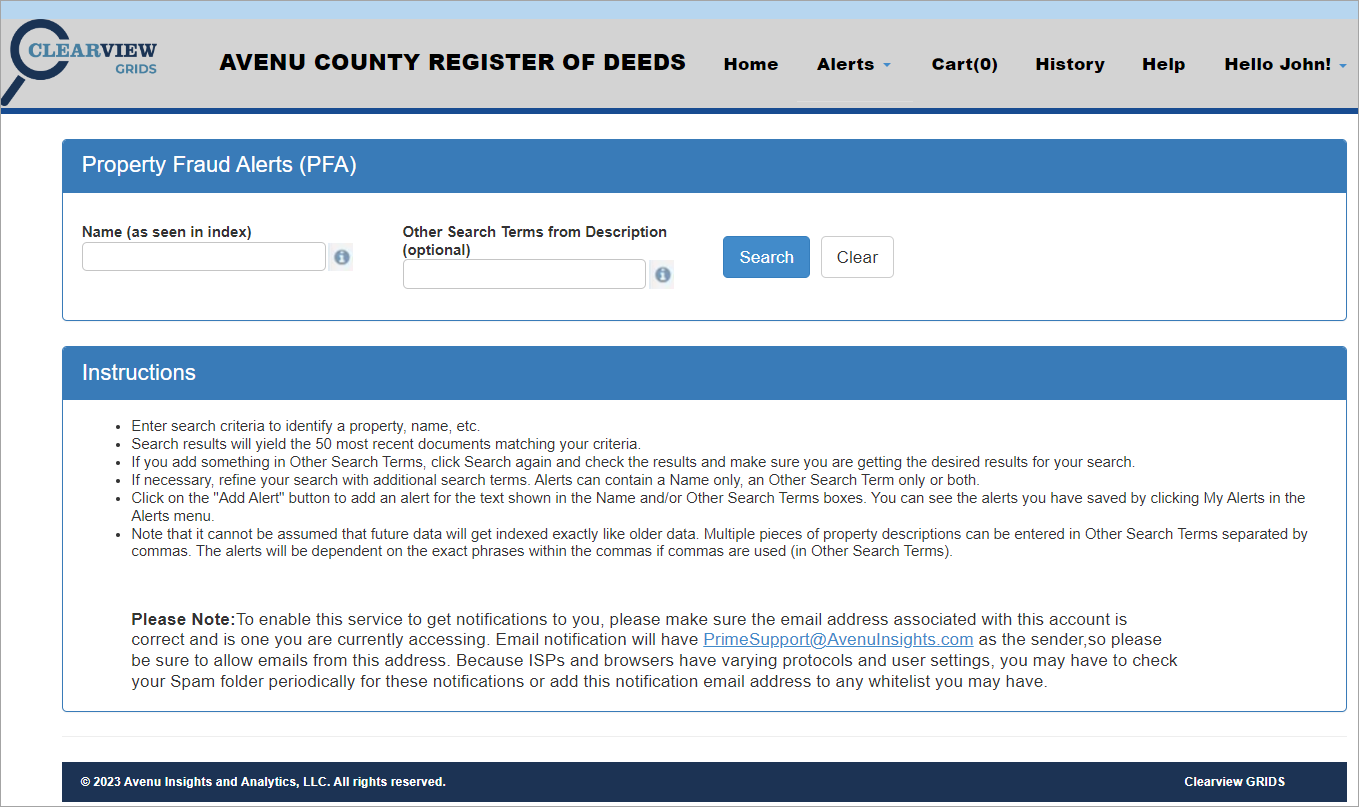
To view the instructions while searching, click the “information” icons next to the Name and Other Search Terms fields.
Locate Property to Set Up in the Alert
Search to locate the property you are interested in submitting.
-
Enter the indexed name associated with the property.
-
Enter additional specific terms or phrases to narrow down the search results.
-
Click Search.
-
To start over, click the Clear button.
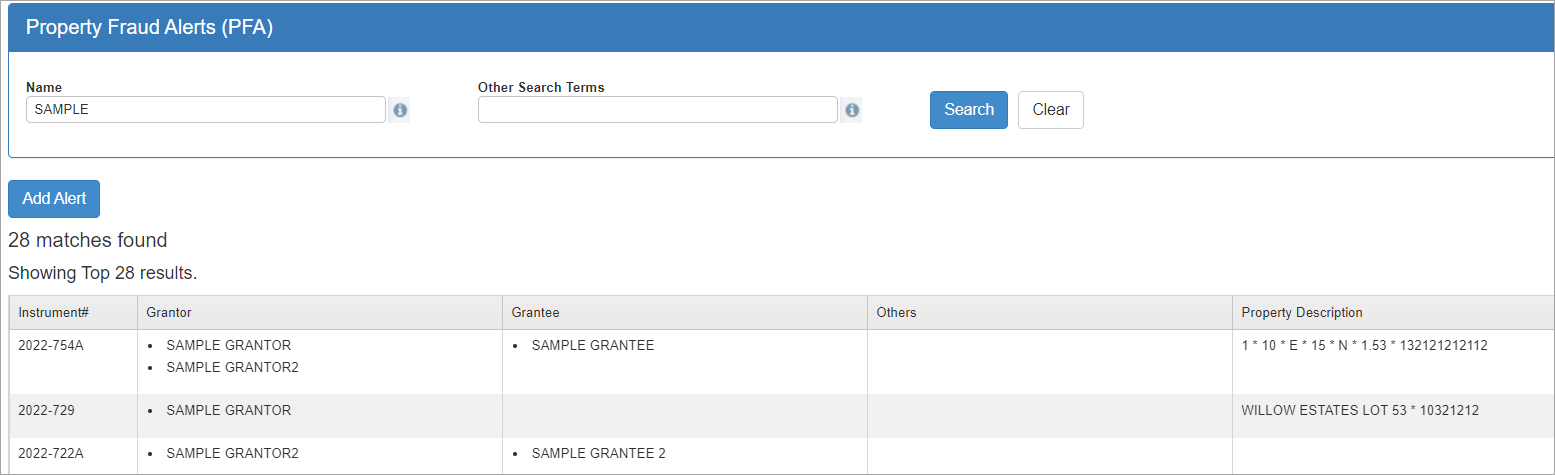
The search results above show that 28 matches were found. In this case, you would want to add more search terms to narrow the results.
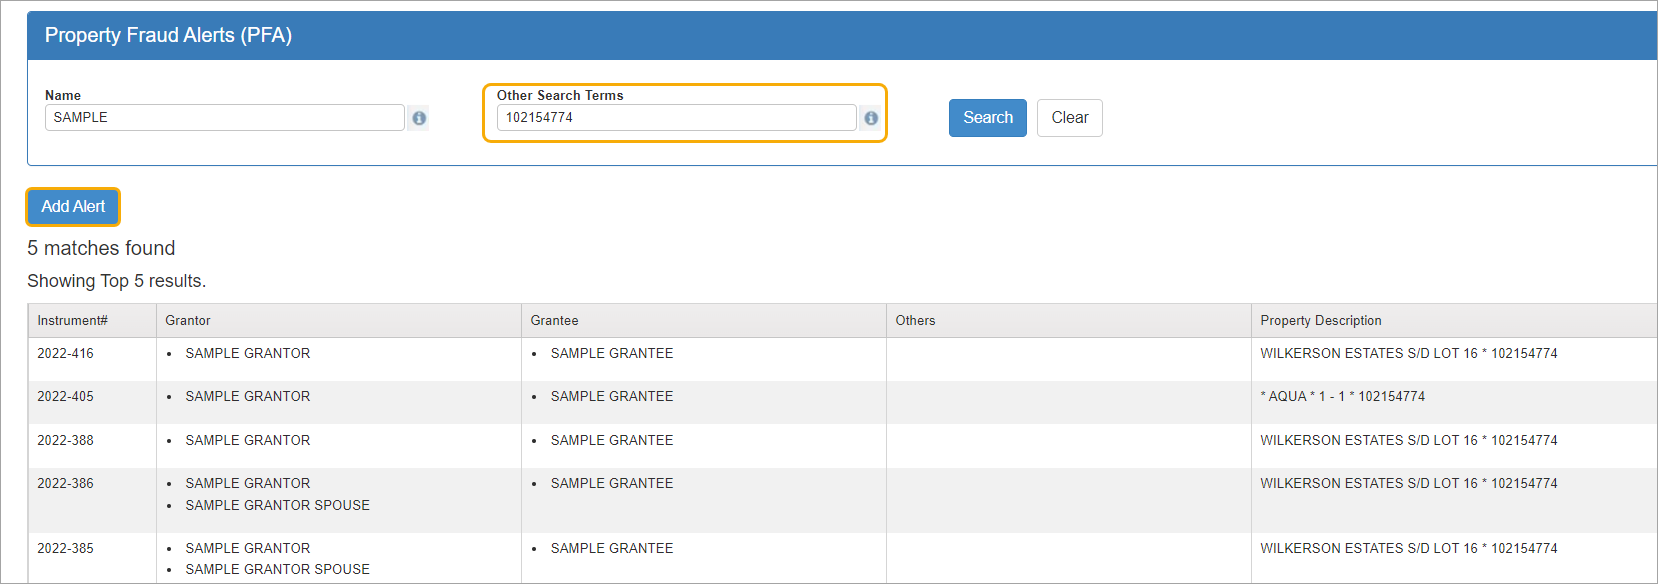
For example, if we add the parcel ID number to Other Search Terms, we narrow the search results down from 28 to just the 5 transactions which include that parcel ID number. You can add more words or phrases in the Other Search Terms field, separating them by commas. Click Search and check to see if the results reflect what you want. Keep refining the search by adding additional property-specific terms until it contains only the property you want to get alerts on.
Submit the Request for the Alert
Once your search results contain just the property you want to receive alerts on, you can proceed with setting up the alert.
Click Add Alert to submit your request for alerts on this property.
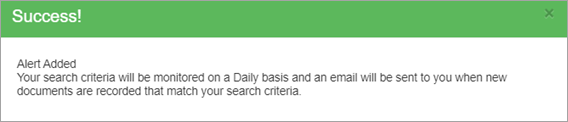
The information is saved and a Success message is displayed.
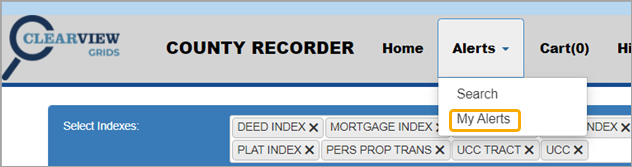
Viewing Alerts You Have Set Up in My Alerts
To see alerts that have been saved, click My Alerts from the Alerts drop-down menu.
Any alerts you have set up will be displayed.

Working with Your Alerts
Each alert you have submitted will appear in its own row. There are three buttons in the row which allow you to work with the alert.

You can click:
-
Edit to change the alert search criteria.
-
Delete to stop receiving alert emails.
-
View Logs to see a history of all alerts received.
Click the sections below for more information on each button.
Clicking Edit brings up the Edit Alert window where you can adjust the frequency for receiving alert messages.
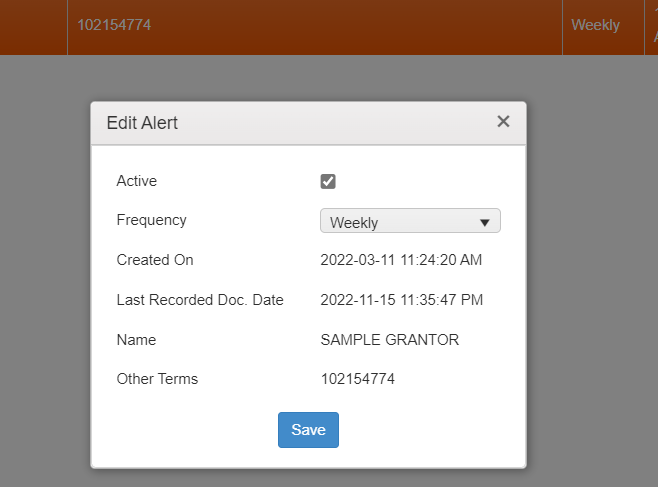
Use the Frequency dropdown to select Daily, Weekly, or Monthly alerts.
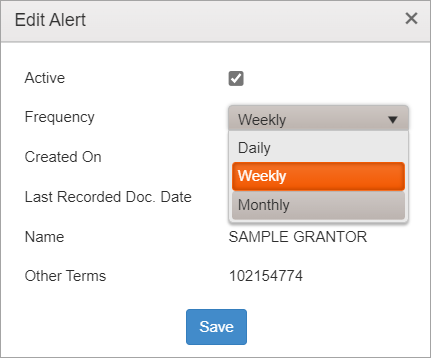
Click Save to save your change.
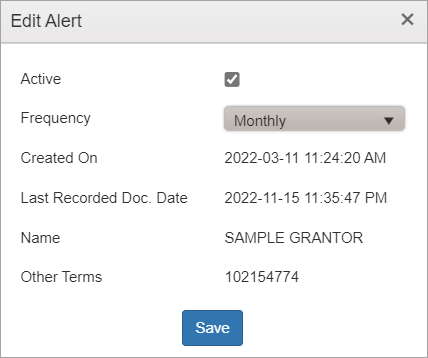
A Success message is displayed.

If you no longer want to receive alerts on a particular property, you can locate it in your My Alerts and click the Delete button.

A confirmation dialog asks if you want to continue with the delete action.
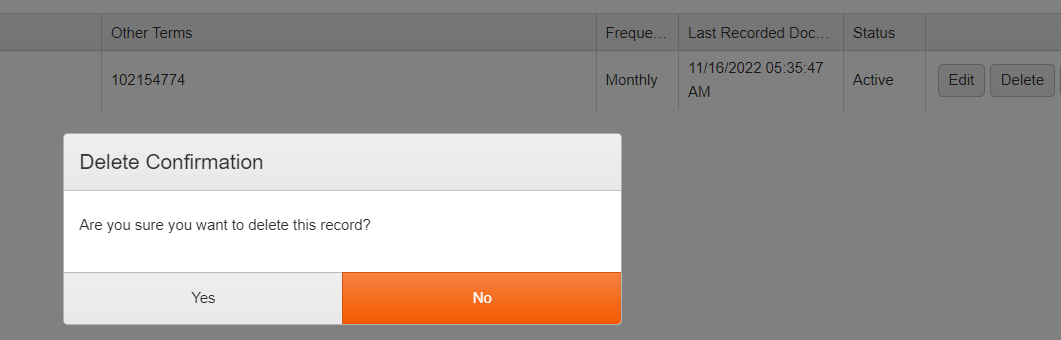
Click Yes if you want to delete or No to back out.
You may need to refresh the screen to see the updated My Alerts page.
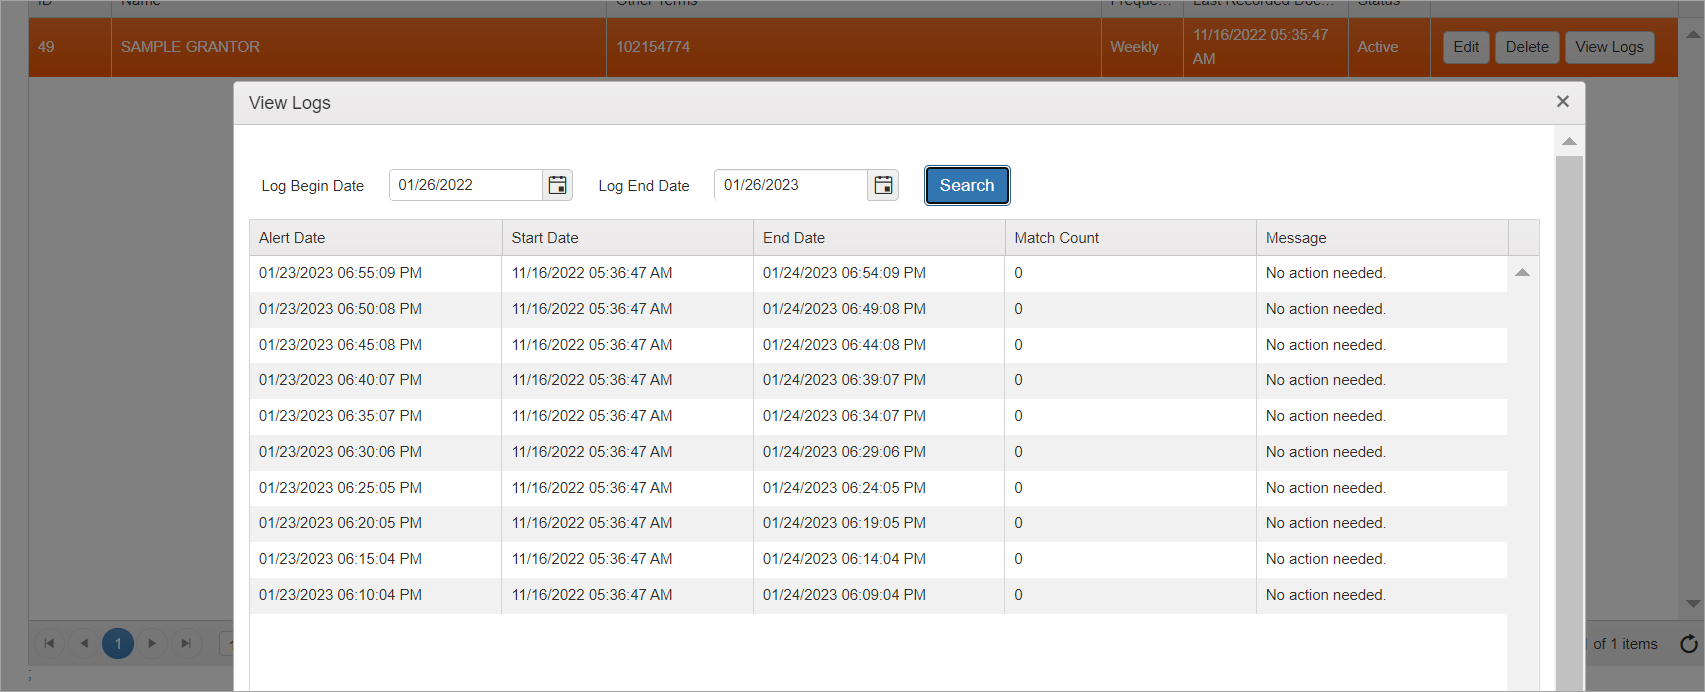
The View Logs screen has Begin and End Date search fields for locating alerts.

Enter the dates for the time period you want to see and then click Search.
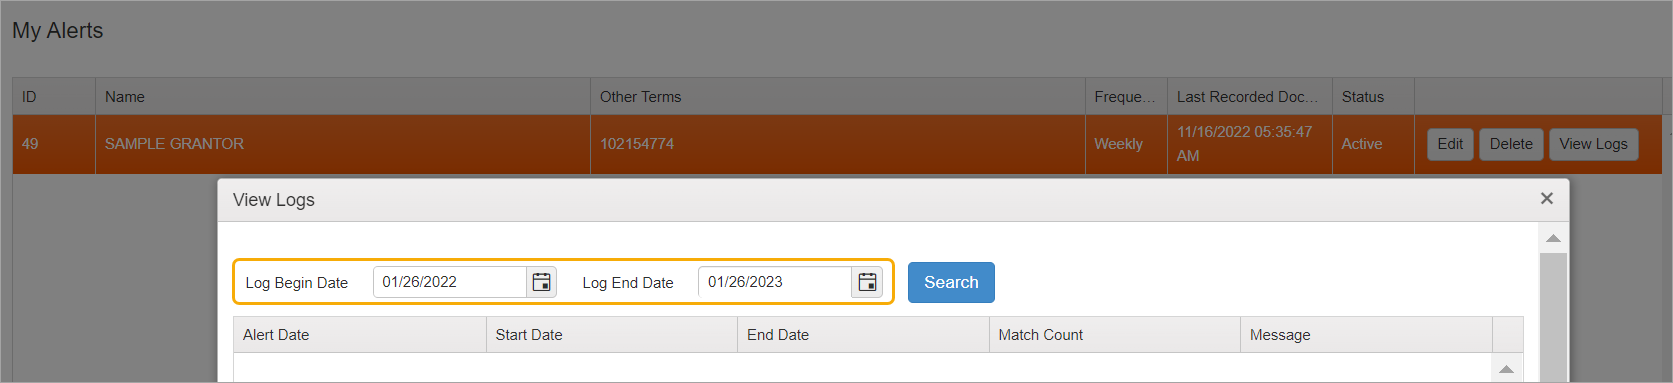
The search brings up all identified alerts.